
This is Part 1 in my experience on making gravlax. You can read Part 2 here.
Recently I went to Ikea with my wife and my mom to pickup a new dresser for our baby on the way. After a grueling afternoon of shopping (at first it’s so much fun walking through the showroom, but then you quickly discover you are trapped in a maze designed to squeeze as much money of you as possible) we stopped at the Ikea cafeteria.
I was thrilled to see a dish that looked almost like raw salmon called gravad lax (or gravlax). I’m a huge sushi fan, my favorite roll being one with salmon, so anything that looks like raw salmon looks apetizing to me.
I worked my way quickly through my first plate of that delicious, dill cured salmon and went back for another. After my second plate I headed down to the food market past the checkout area and bought several packages of gravlax to take home.
Within several days I had polished off my pre-packaged gravlax and needed more, so I headed to Wegmans where I bought a few more packs of their less expensive and less delicious brand. But even the “economy” package was 12oz for almost $14. I couldn’t just stop eating gravlax, but I couldn’t afford to keep eating it this way.
So I decided to try my hand a making my own gravlax. I found several online recipes and even a YouTube video of Jamie Oliver making gravlax. I decided to combine what I found into my own recipe. Here’s what I did.
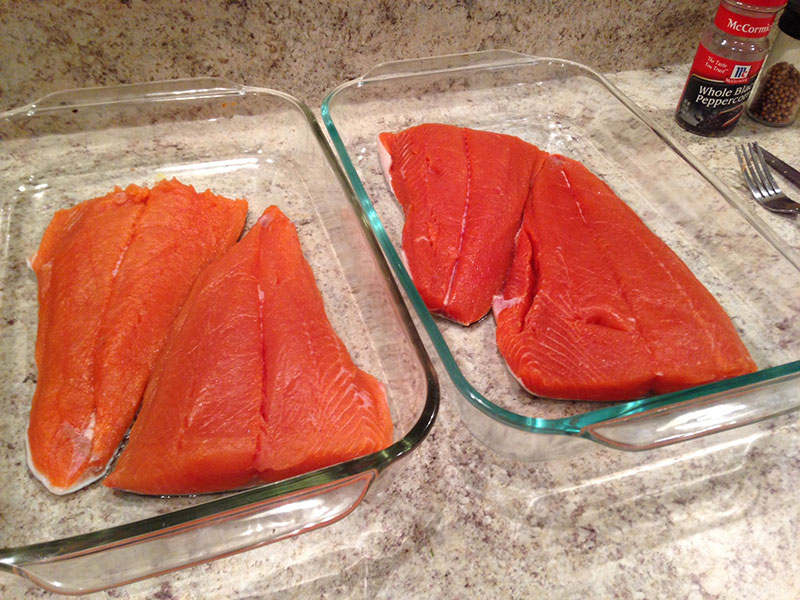
1. Buy fresh salmon
While I found no shortage of variations on how to prepare your gravlax, everyone agrees that for best results get the freshest salmon you can find.
I was able to get almost 4 lbs of fresh salmon filets that had just arrived that day from Wegman’s deli.
2. Freeze the fresh salmon for 36 hrs
Freezing the fresh salmon immediately for about 36 hrs will kill any bacteria or parasites that may exist in the salmon. Not everyone says this is necessary if you get your fish fresh enough, by why risk it? Just do it.
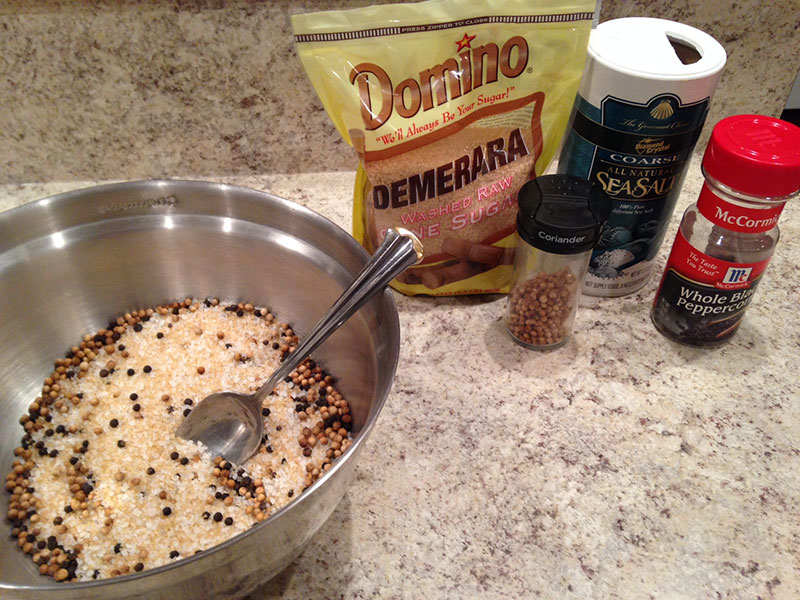
3. Prepare the cure
Here’s the list of items I chose to use for my cure. Like I said the recipes I found all had some variations, but most included most of these items:
- 4 lb fresh salmon
- 1/2 cup course salt (sea salt)
- 1/3 cup cane sugar (or regular sugar if you prefer)
- 2-3 tablespoons whole black peppercorns
- 2-3 tablespoons coriander seeds
- 2-3 tablespoons lemon juice
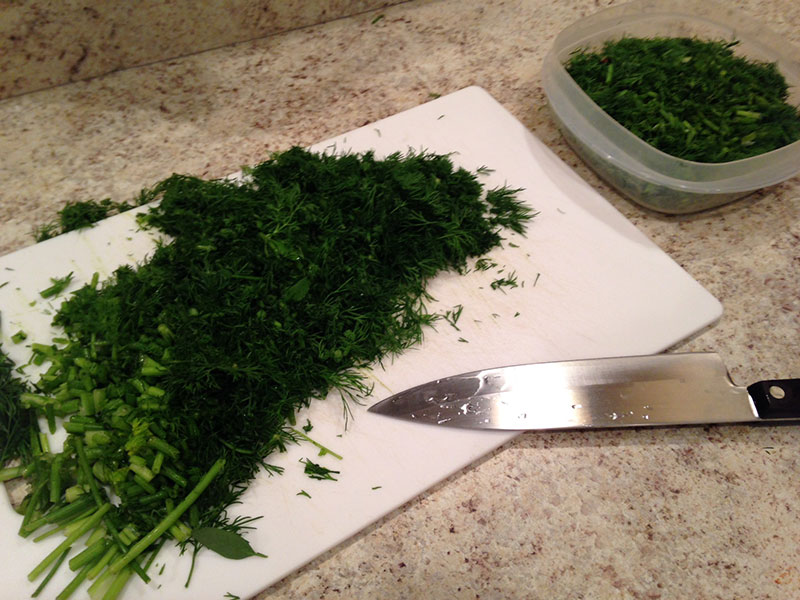
- 2 bunches of fresh dill, coarsely chopped
- 4-5 tablespoons fresh grated ginger root
- 1/4 cup gin
- 1/4 cup yellowtail red wine
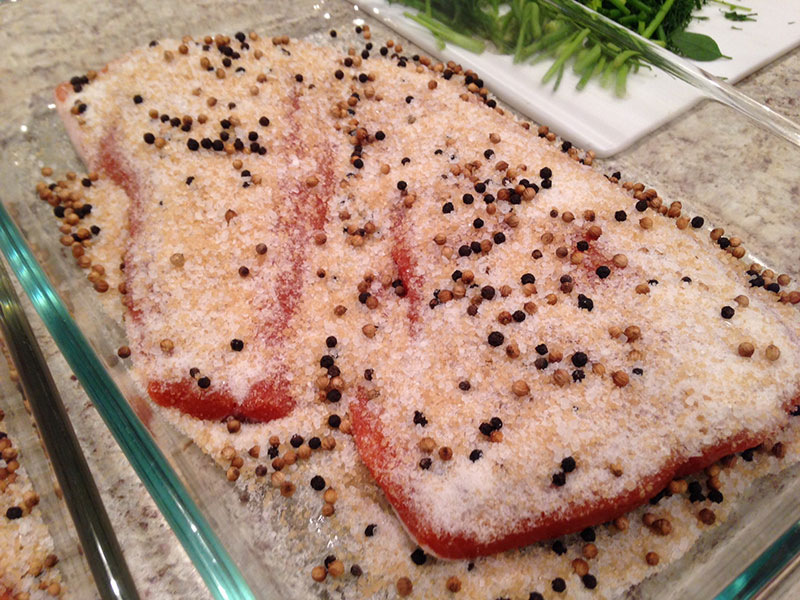
4. Apply the cure
Once you have your ingredients prepared, it’s time to apply the cure. You should have your fillets skin down and flesh up. We’re going to apply the cure mixture to the flesh, then sandwich the fillets together so the skin is facing out on both sides, with the cure mixture in the middle.
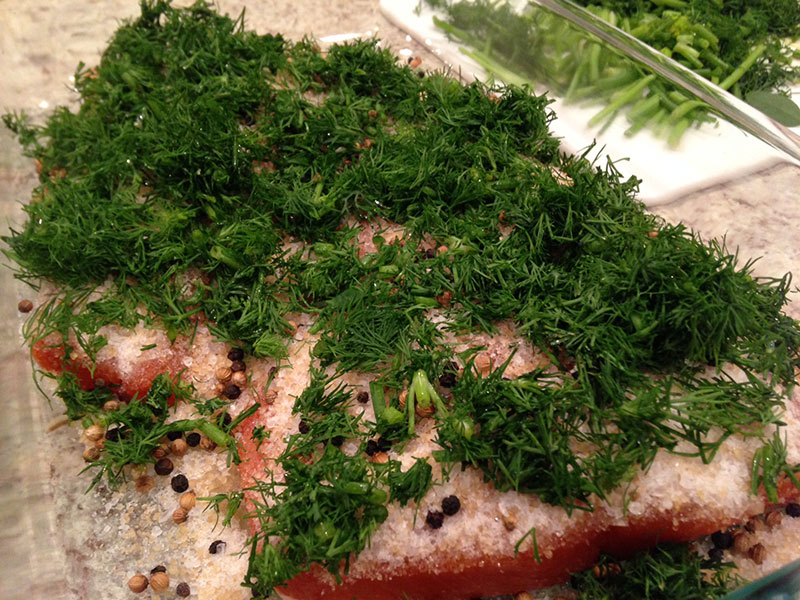
Apply the spice mixture
Mix your salt, sugar, coriander seeds and black peppercorns in a mixing bowl. Then spoon the mixture over the flesh side of the salmon, covering liberally.
Apply the chopped fresh dill
Coarsly chop your dill and spread it on the salmon above the layer of spices. NOTE: I did see conflicting instructions on whether to put the dill down first, or the salt/spices down first, so I chose the salt & spices primarily because that’s how Jamie Oliver did it, and he’s famous, so…lol
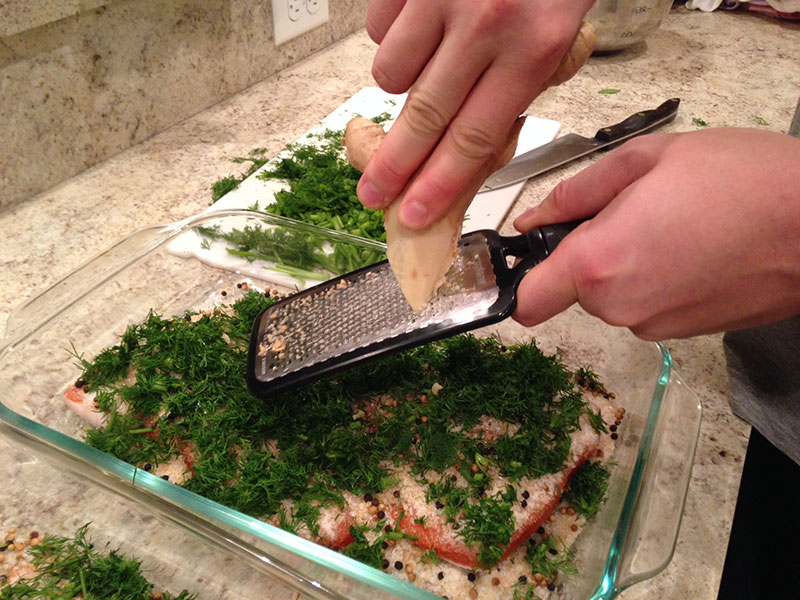
Add grated ginger and lemon juice
I chose to add a couple non-traditional elements that I think will compliment the flavor of the dill: ginger root and lemon. Using a larger sized cheese grater, apply the ginger root liberally on top of the dill weed. Then squeeze some fresh lemon juice over the mixture.
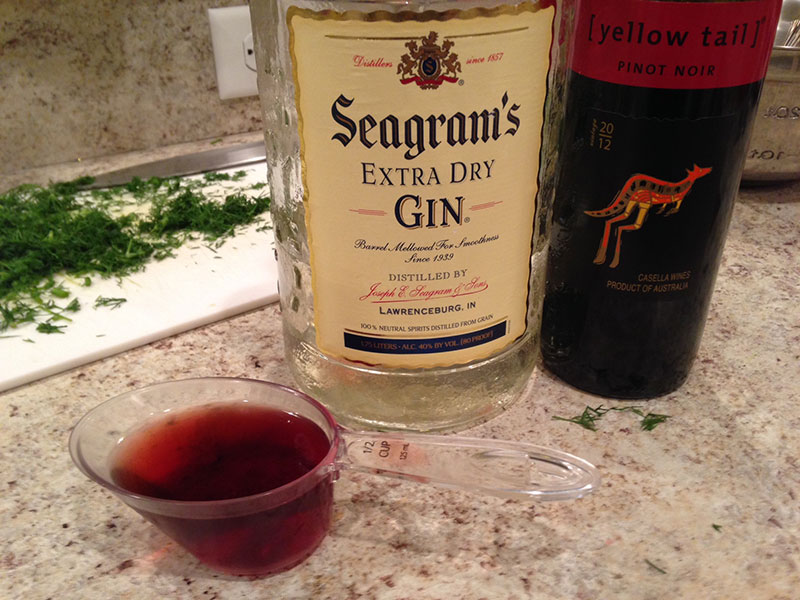
Mix gin & wine and dash it on
In my research I found several different types of alcohol suggested for your cure, including: cognac, schnapps, white wine, and vodka. I settled on a mixture of approx 1/4 cup red wine with 1/4 cup gin (mainly because it was all that I had available). Dash the mixture over the top of the salmon.
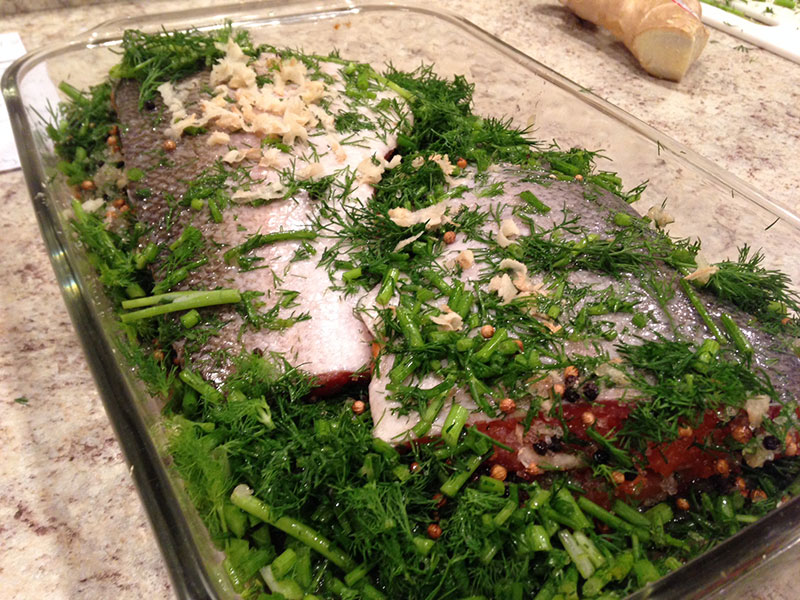
Combine fillets on top of each other
The next step is to make the cure sandwich by putting the fillets together, flesh side facing each other with the cure mixture in the middle.
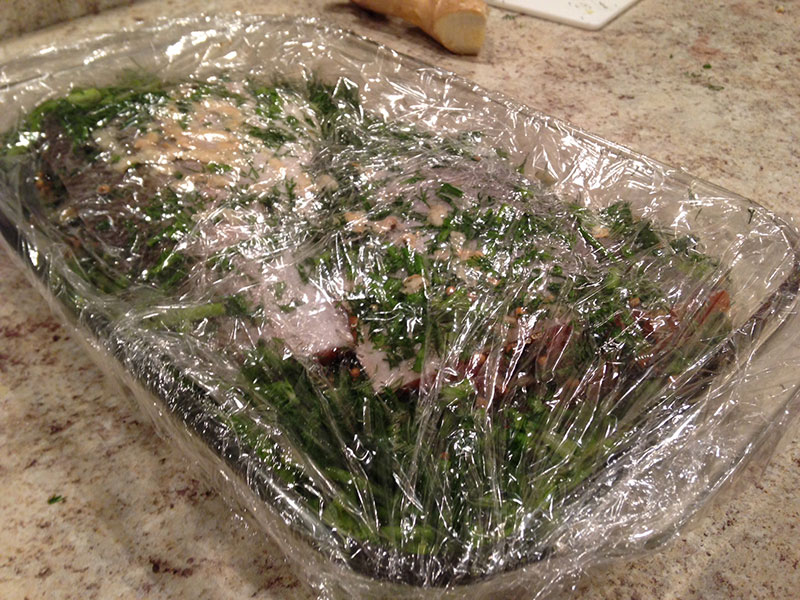
Cover with cling wrap
Cover loosely with cling wrap to keep the oders from filling your fridge, and to protect the salmon while it cures.
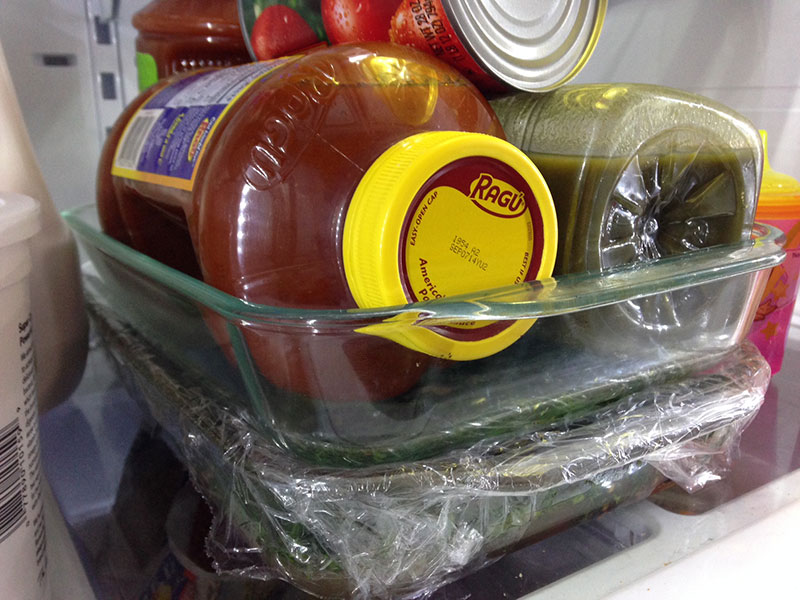
Apply pressure, refridgerate 48hrs
In case you didn’t get this part yet, the word gravlax translates to burried salmon because in the middle ages they would cure the salmon with salt and by burrying it several feet under the sand so the pressure of the sand would help the cure to seep into the meat.
We don’t have to use sand, but we’re going to apply pressure by putting weight on top while it cures.
I used another corningwear dish set on top of the salmon with some heavy items in it. Leave the salmon to cure this way in the refridgerator for a full 48 hours.
To be continued.
Check back in a couple days for part 2 of my experience when I bring the gravlax out and devour it!
Continue to Part 2.